OwnTracks with NixOS and Tailscale
Posted on Fri 21 February 2025 in self-hosting
In an effort to reduce my reliance on big tech I recently decided to try using OwnTracks to replace Google Maps Timeline. This article provides a rundown of how I accomplished this using an existing home server running NixOS and my existing Tailnet.
Background
For various reasons I find it useful to be able to review my past whereabouts, and Google Timeline has worked fairly well for this purpose. At some point Google changed Timeline to only store location history on the mobile device, removing it from the Maps web app. I've also found that the UI for Timeline on my phone has become laggy and feels like it could fail at any time. These seem like warning signs that Google may be neglecting the service or that it may be dropped entirely.
To hedge against that possibility and in furtherance of my general goal of reducing dependence on big tech, I've decided try replacing this service with OwnTracks.
OwnTracks
OwnTracks consists of a few components, including mobile apps for Android and iOS that send location updates to a server. The server can either be an MQTT broker or the OwnTracks Recorder. Using an MQTT broker permits live location sharing among devices running the app. Since I only care about recording my location history, I can forgo the MQTT broker and set up the app to publish updates directly to the recorder via HTTP.
The OwnTracks Recorder acts as a database to store location histories published by the mobile apps. It also provides APIs for querying the stored histories.
There is also an OwnTracks Frontend which provides a web app for viewing the stored location histories from the Recorder service.
Tailscale
Tailscale is a peer-to-peer VPN solution. Since I already have Tailscale set up on my home server and my phone, I can avoid a lot of fiddly work securing (in both senses of the word) a publicly available IP address for my server. As long as my phone is connected to my Tailscale VPN, known as a Tailnet, my phone can directly connect to the server.
Running the OwnTracks Recorder
I added a systemd service declaration to my NixOS configuration on my
server to run the OwnTracks Recorder service. To avoid running the
service with root privileges I'm using the dynamic
user
facility provided by systemd which automatically creates an
unprivileged user to run the process. The StateDirectory directive
causes a directory to be created under /var/lib with permissions
allowing the service to store its persistent state (the location
histories, in this case) across restarts.
Since OwnTracks Recorder has been packaged for NixOS I can reference the package directly to invoke the service, and Nix will automatically make sure it is installed. I'm using the unstable channel so the package includes a recent commit which fixes the HTTP mode for the service. This is necessary for the setup to work. The fix should be included in the next stable release of NixOS.
When the executable is invoked it is provided with the path to the
dynamic user's state directory via the --storage flag. The --port
0 flag tells Recorder not to try to connect to an MQTT broker. I
leave the HTTP port at the default 8083. Other command line options
are in the
documentation.
systemd.services.owntracks = {
enable = true;
description = "owntracks recorder";
serviceConfig = {
ExecStart = ''
${pkgs.owntracks-recorder}/bin/ot-recorder \
--storage /var/lib/owntracks/recorder/store \
--port
0
'';
DynamicUser = true;
StateDirectory = "owntracks";
Restart = "always";
};
wantedBy = [ "multi-user.target" ];
};
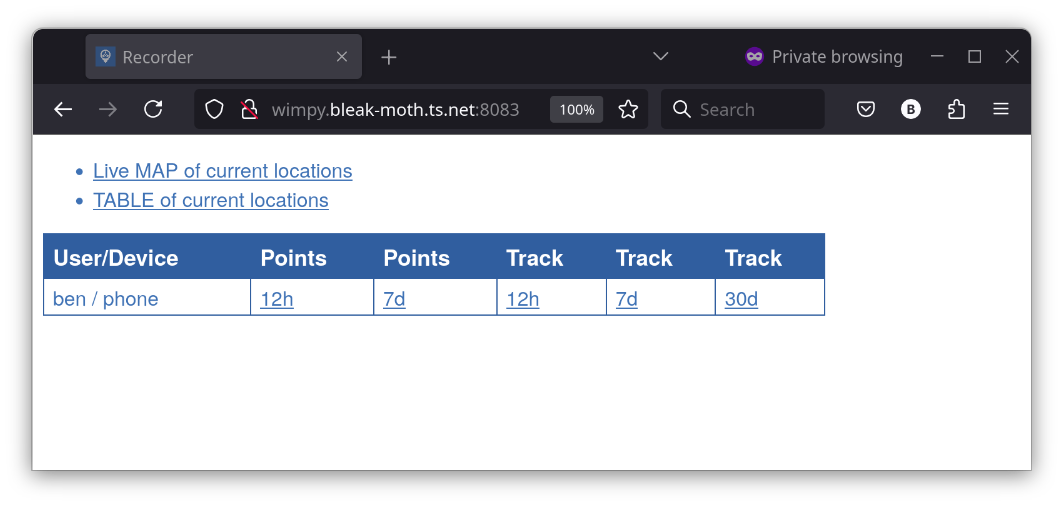
Running sudo nixos-rebuild switch will start the Recorder
service. This can be verified by visiting the HTTP endpoint in a
browser. Within my Tailnet my server is reachable at
wimpy.bleak-moth.ts.net. Since the Recorder service is using its
default port, I can confirm it is running and available from my
Tailscale connected laptop or phone by visiting
http://wimpy.bleak-moth.ts.net:8083. There I will see the minimal
web page the server provides:
Setting Up the Mobile App
The OwnTracks mobile app can be installed from the Google or Apple app
stores. It needs to be configured to send updates to the recorder by
setting the Mode and Endpoint URL values in the app's
Preferences -> Connection menu. The mode is set to HTTP since I'm
not using MQTT. The endpoint URL is set to
http://wimpy.bleak-moth.ts.net:8083/pub. This is my server's FQDN
plus the path for publishing updates. I was stuck for awhile due to
not knowing the /pub path was required.
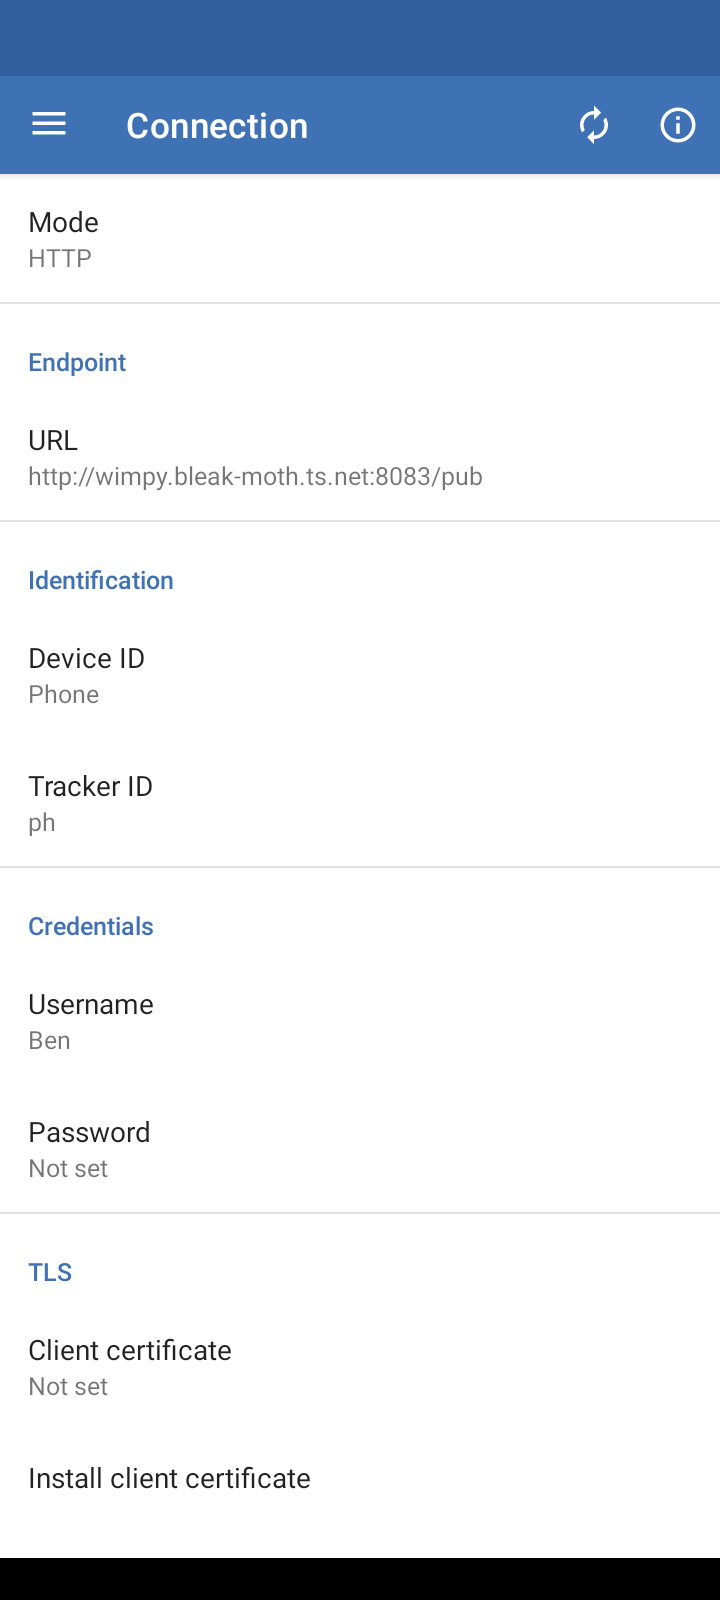
As seen above, the Connection settings also include Identification and Credentials sections. Since the VPN prevents anyone else from accessing the server, I am not setting up any sort of access control in the OwnTracks system. Thus the credentials do not need to be set, but it is worth setting a user name so that the stored location history will be recorded under that name. This name will then appear on the maps. Likewise, the values for Device ID and Tracker ID.
With the Connection settings configured, the mobile app should start sending location updates to the server. Updates can be manually pushed by clicking on the upload button in the map header of the app's main view.
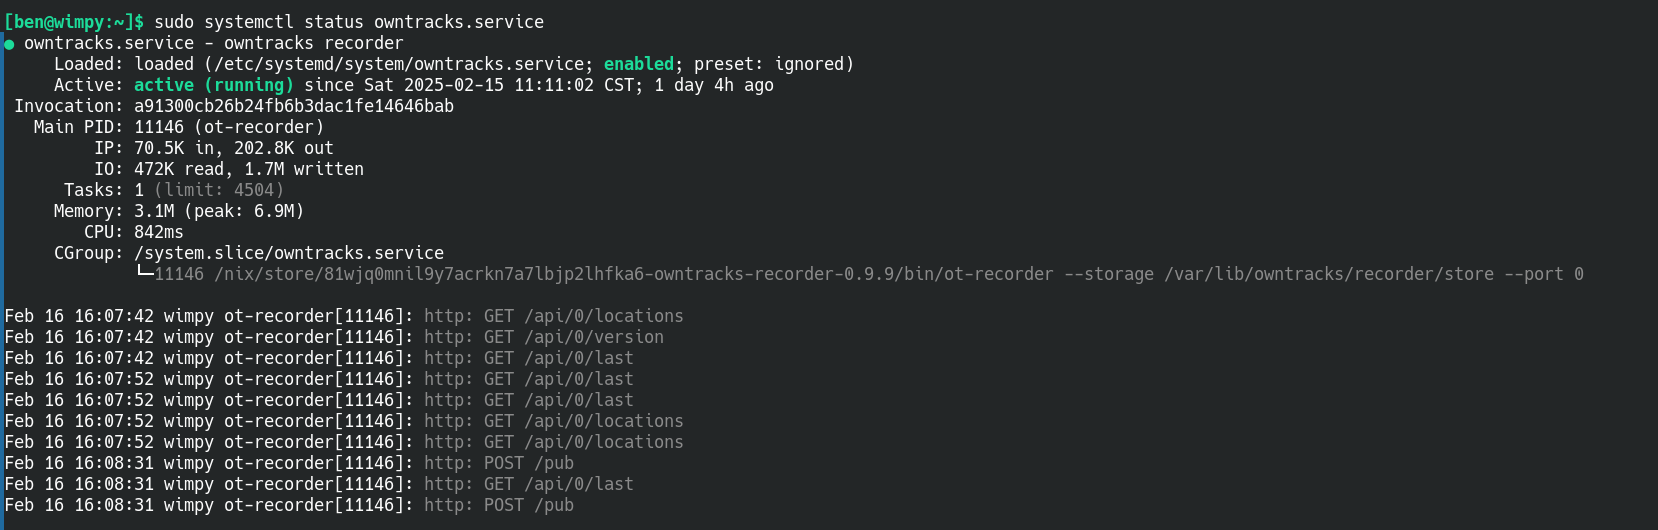
I'm able to confirm the server is receiving location updates by
checking the logs for the OwnTracks Recorder service. Notice the POST
requests to the /pub endpoint. These correspond to pushing the
upload button in the app on my phone.
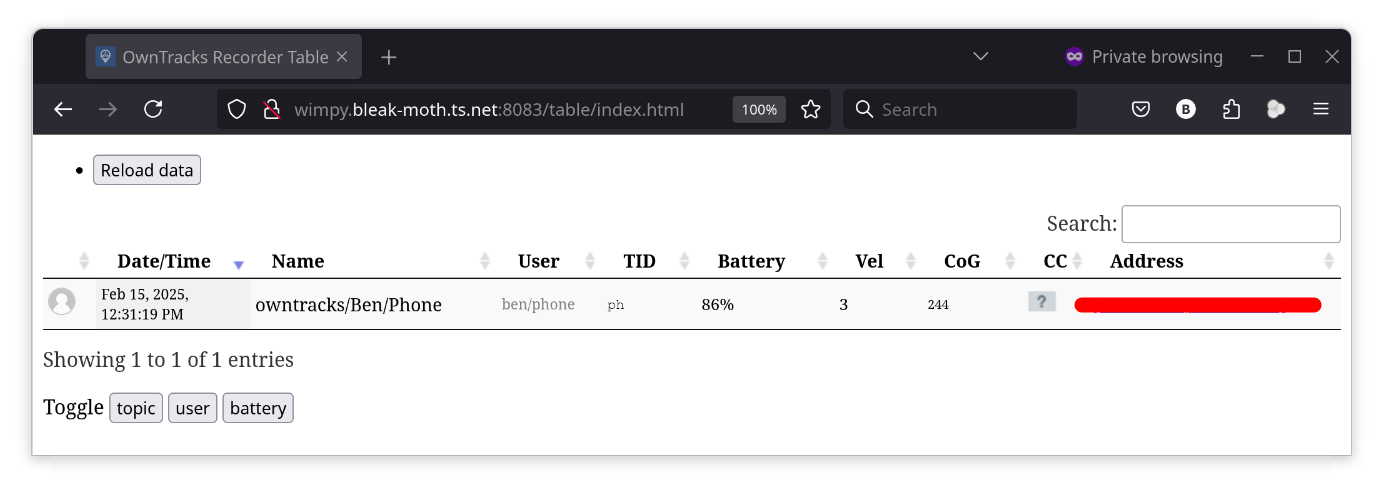
I can also check that locations have been uploaded by opening the location table link from the server's main web page.
For troubleshooting purposes, the mobile app provides a Status menu
with useful information including logs. I found it helpful in getting
the connection established. I think the logs were what clued me into
the /pub path.
Setting Up the Frontend
Once I had my location updates being recorded, it was time to set up
the frontend so that I could view the history. The OwnTracks
Frontend is a single page
application that can be served from any webserver. Since I already had
Nginx running and serving static pages out of /var/www/html/, it was
pretty easy.
The
README
offers instructions to either use Docker or build the app manually,
but I just download the zip archive from the repo's
releases
page. Inside, in typical NPM package fashion, is a dist directory. I
copied the contents to /var/www/html/owntracks.
The app is configured by copying the config/config.example.js file
to config/config.js and making edits there. For this setup I needed
to set two values. The api.baseURL for the OwnTracks Recorder's API
is set to http://wimpy.bleak-moth.ts.net:8083. And router.basePath
is set to owntracks since I'm hosting the app under that path. If
router.basePath is not set correctly, the app will load but not
display the map.
// Here you can overwite the default configuration values
window.owntracks = window.owntracks || {};
window.owntracks.config = {
    api: {
        baseUrl: "http://wimpy.bleak-moth.ts.net:8083"
    },
    router: {
        basePath: "owntracks"
    }
};
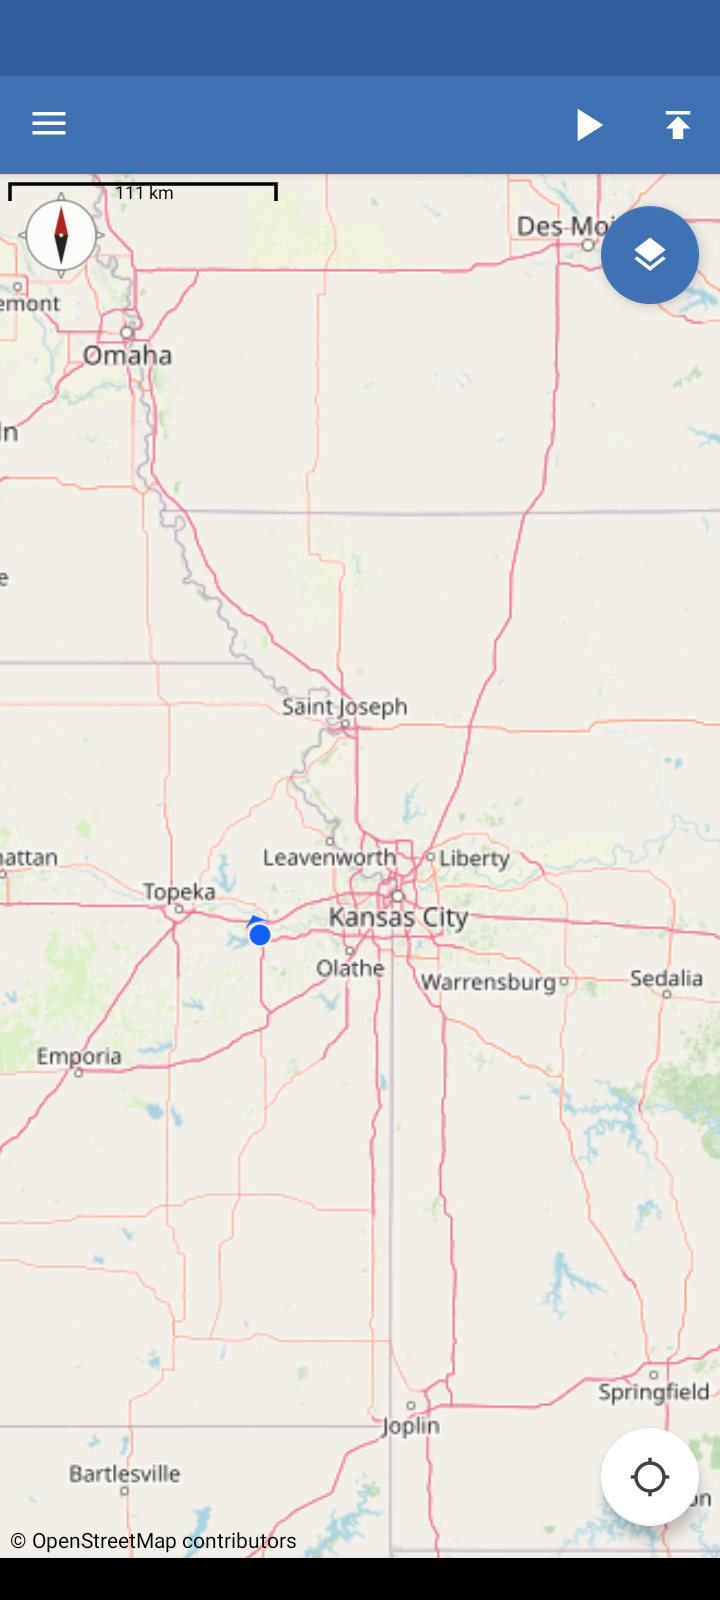
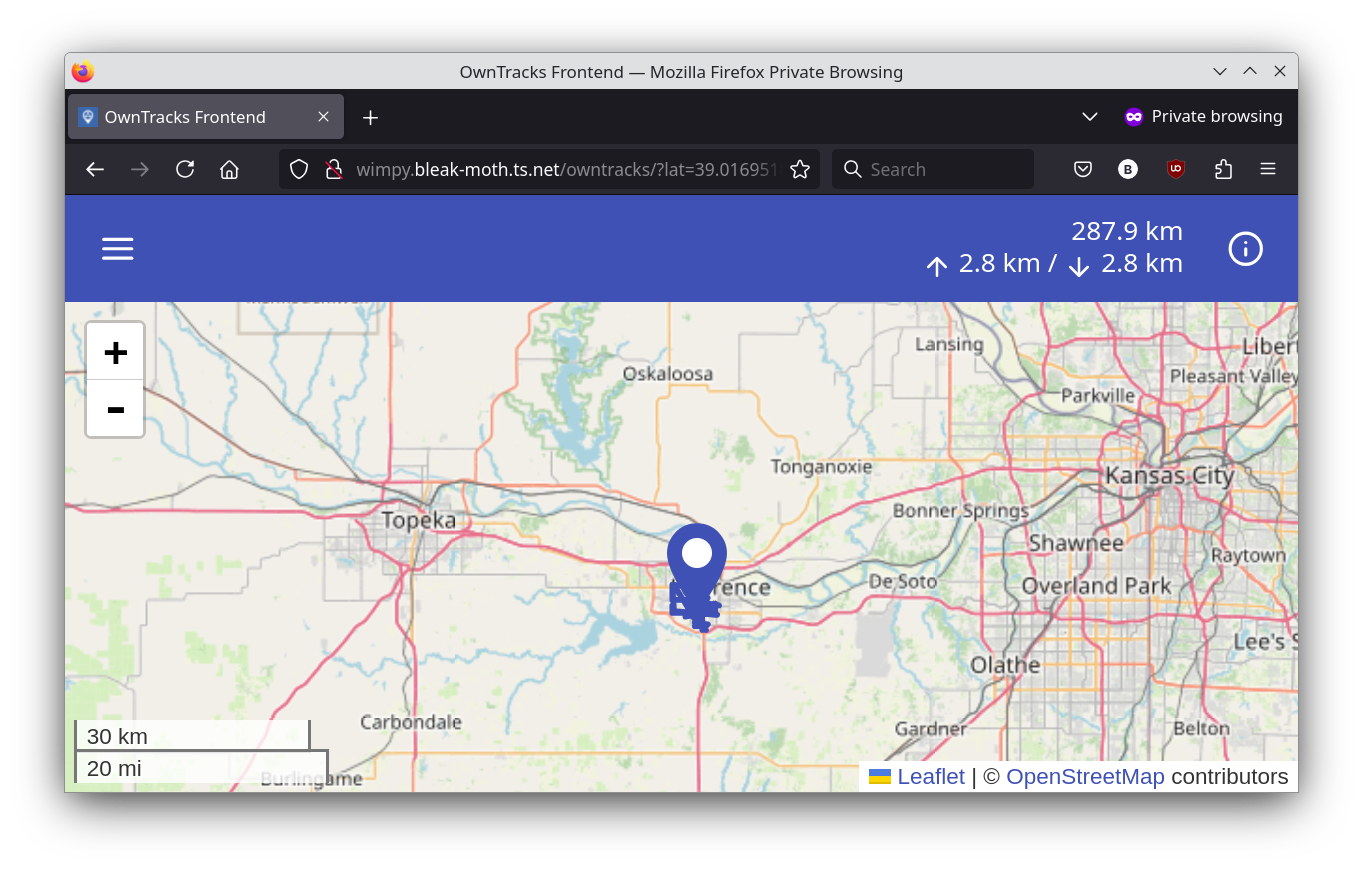
The working frontend looks like the image below and provides options to view location history for past date-time ranges and with options for points, lines, and a heatmap. Here I have zoomed the map way out to avoid advertising my exact location to the Internet.
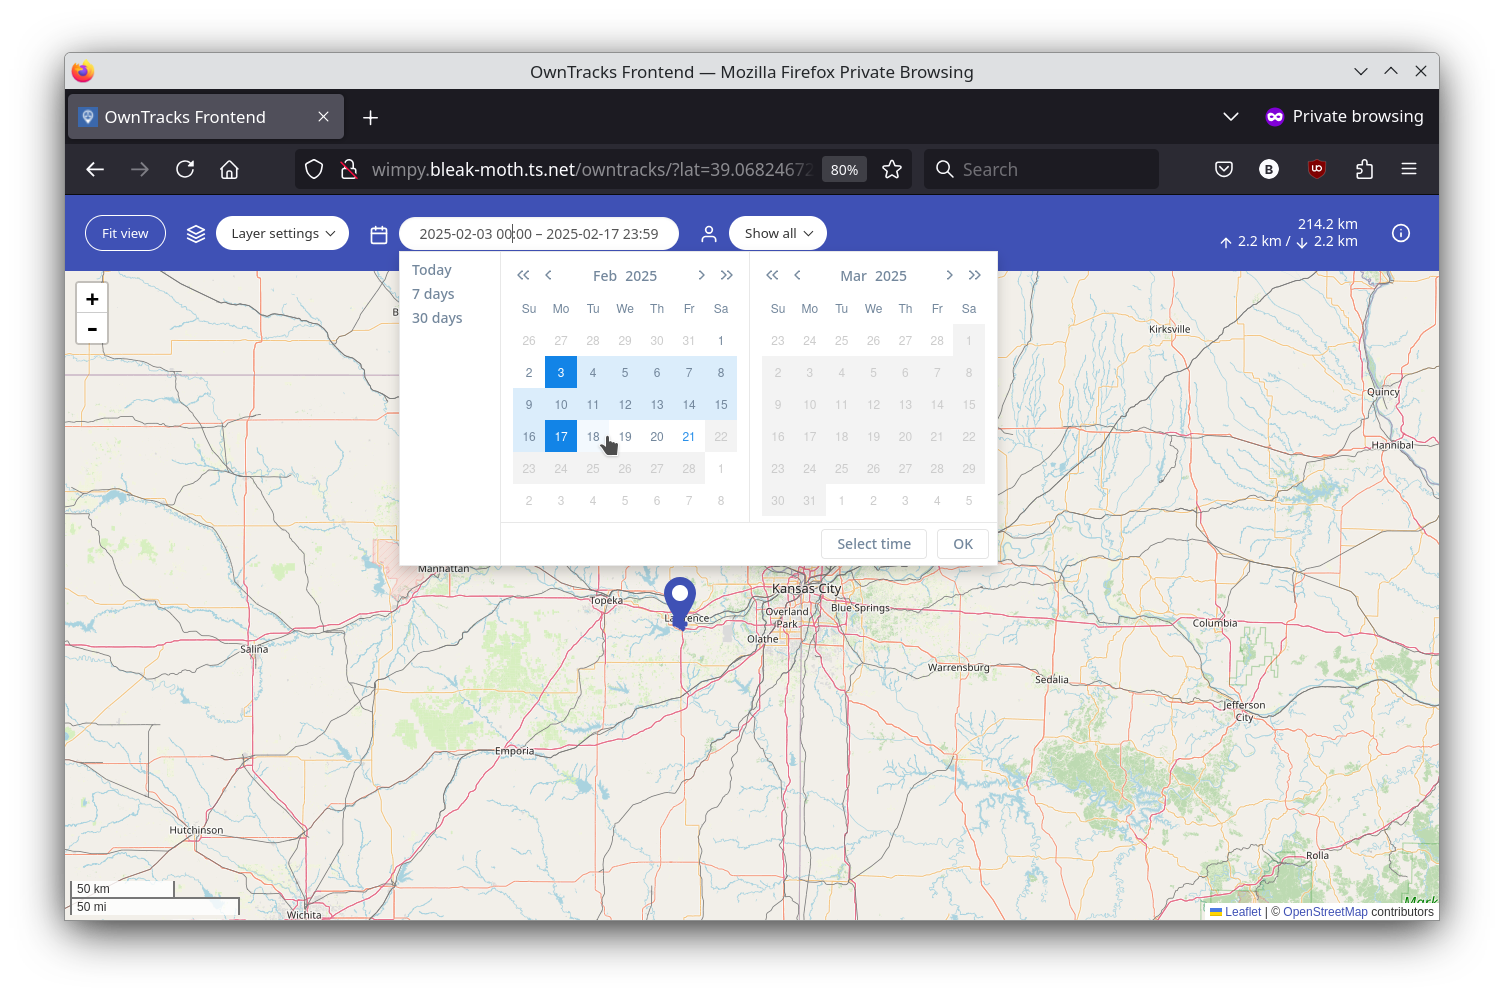
My use case mostly involves viewing location histories for specific days. At first I was confused by the UI for selecting dates. The trick is that you have to select the date range by clicking on the start day in the calendar and then the end day. If you want just a single day, you have to click on that day twice.
Conclusion
At this point I have a setup which seems to be working well enough for my purposes. I've been using it for a few weeks, and I'm able to look back over my history to see where I was at particular times. There are a couple of things I would still like to do. First, it seems like I should be able to write an ad-hoc Nix derivation for the OwnTracks Frontend so that I can include it declaratively in my NixOS configuration. This would be preferable to manually downloading and copying the distribution. Secondly, I'd like my data to be backed up. I think this should be as simple as setting up Borg and pointing it at the OwnTracks Recorder's state directory.